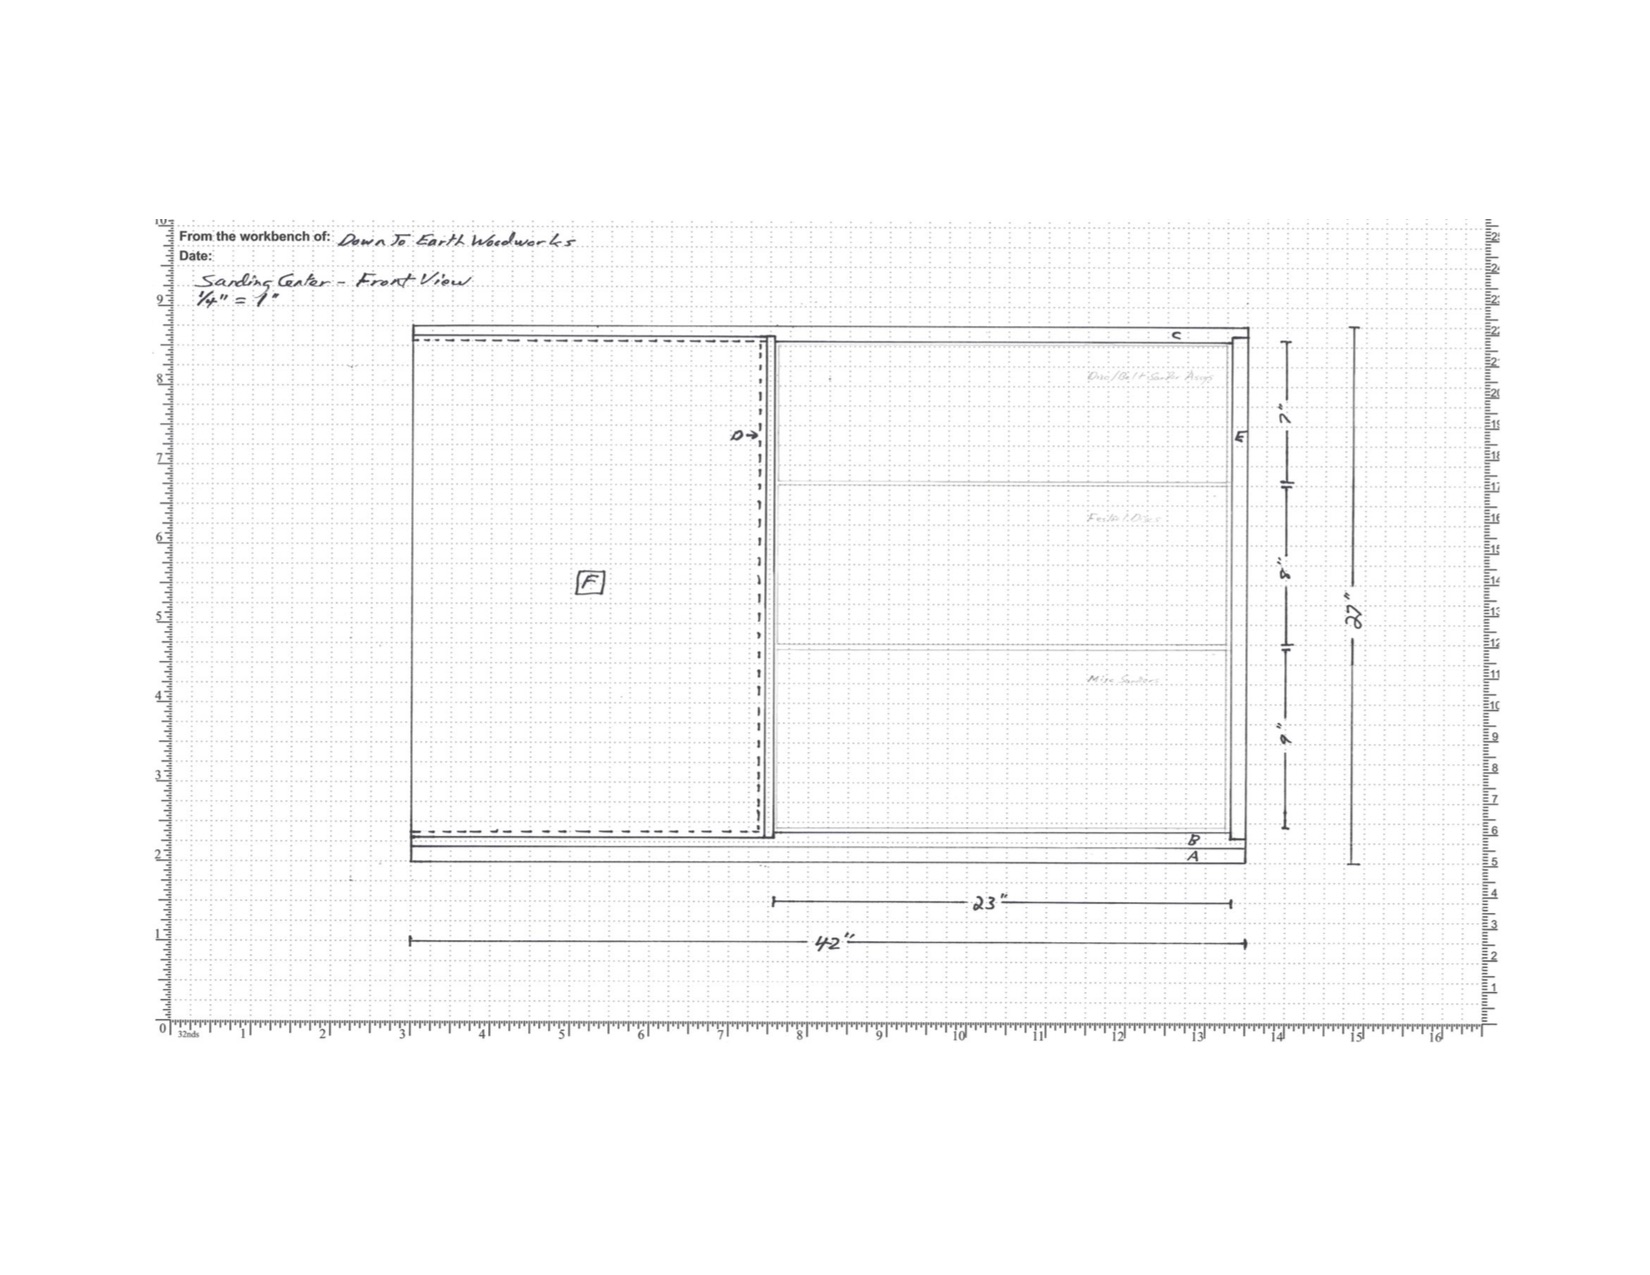

Mobile Sanding Center is home to a combination belt/disc sander, an oscillating spindle sander, and in its spacious drawers, every handheld sander, all supplies, and everything else related to sanding. It's great to be organized! A dust collection manifold with integrated power supply tops off this design!
Part 1 - Design Criteria for a Mobile Multi-Unit Sanding Center & Sanding Supply Storage Unit. In this Part 1 video, Steve works out the design criteria for a mobile unit to hold a bench top oscillating spindle sander and a combination belt / disc sander with room for a third machine in the future.
Part 4 - The Mobile Sanding Center is ready for glue-up. Work through the mock-up, refine the order of assembly, then add glue! Also in this installment, Steve attaches the wheels and gets ready to start making drawers. Can you really cut box joints in plywood? Well, we will soon see!
Part 6 - Install full extension drawer slides quickly and easily without stress, fussy measuring, or fiddling with adjustments. Work out the drawer spacing, make a few simple spacers, and get to work. About six minutes per drawer. The mobile sanding center is in the home stretch now.
Part 9A - Steve starts to build the dust manifold and power center for the Mobile Sanding Center in this two-part finale. In Part A, Steve cuts out and prepares the parts, gathers up all the electrical and dust collection fittings needed, and glues together the basic dust manifold.
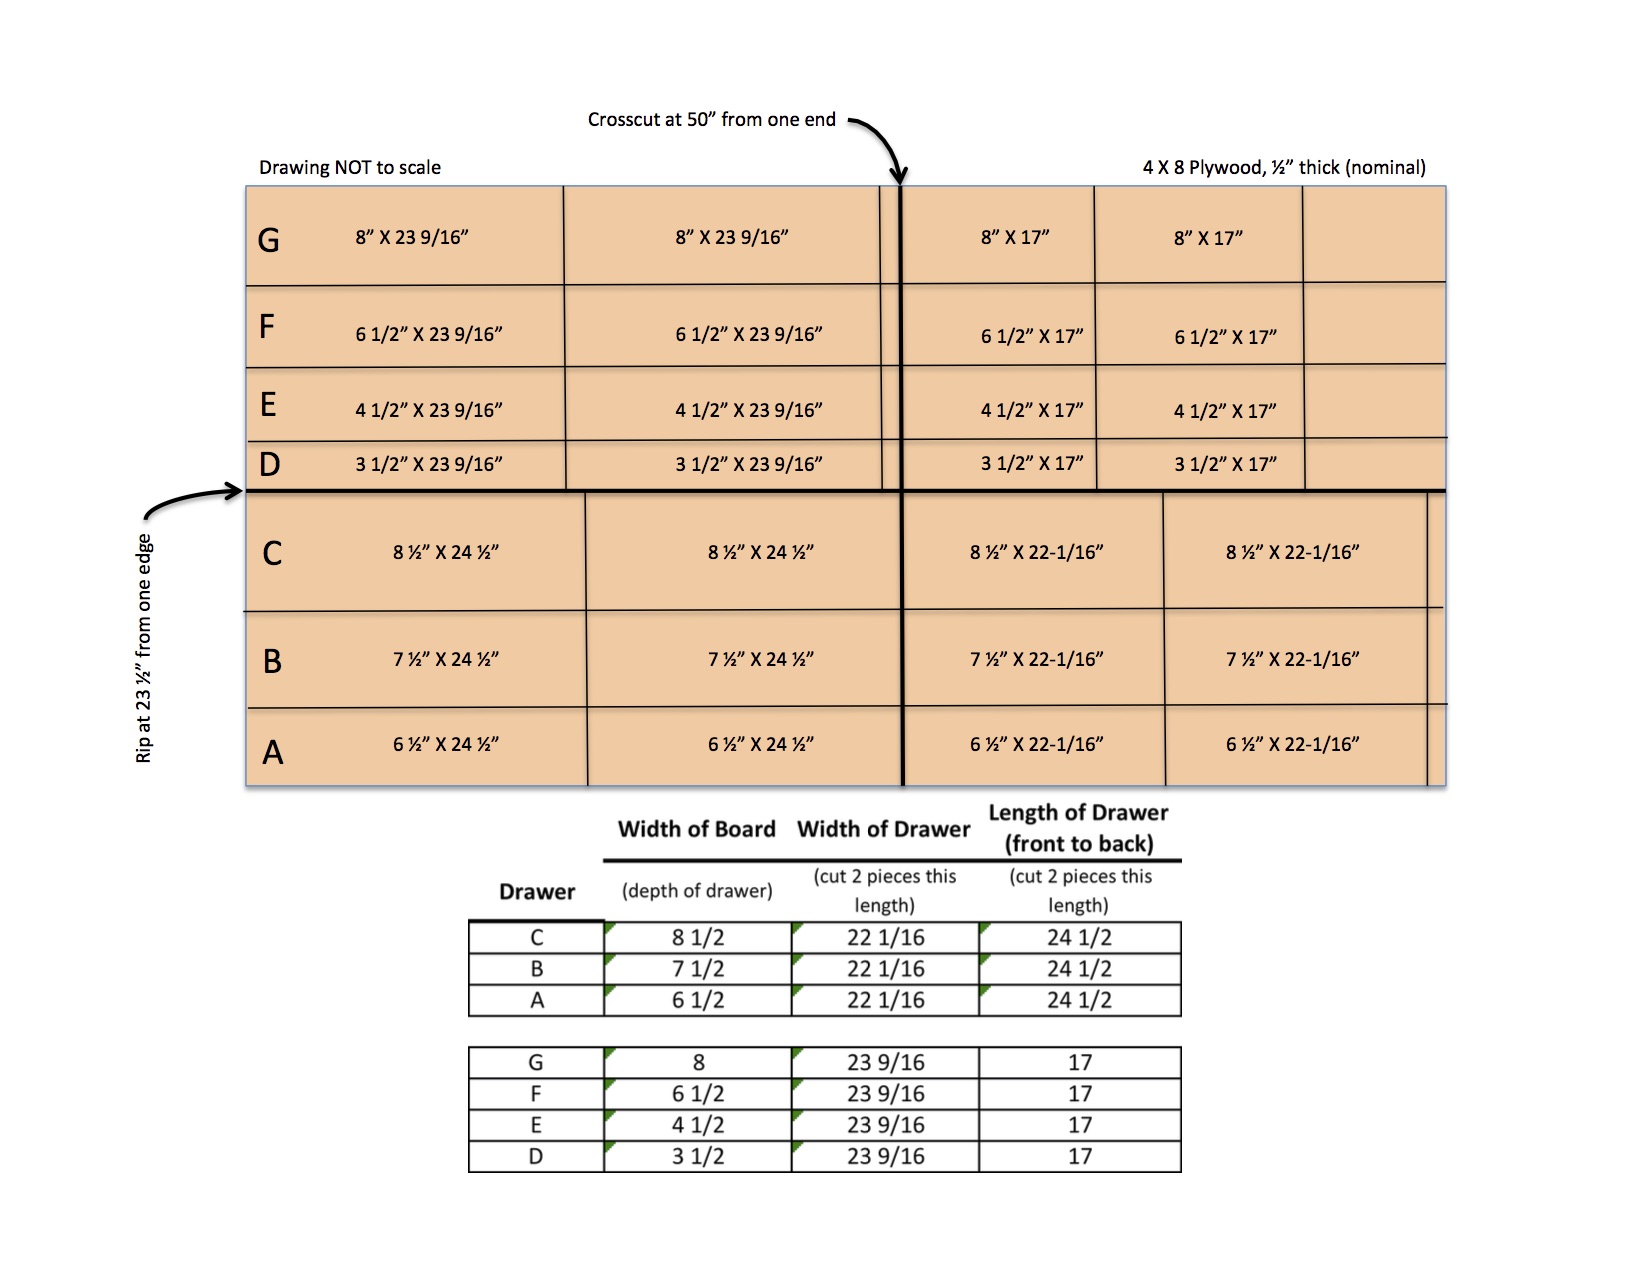
Part 2 - After finalizing the design, the next step in building the mobile multi-purpose sanding center is to cut out the parts. For this Steve uses the Festool TS55 track saw and guide rails to make square clean edges on the plywood and cut the parts to size.
Part 5A - Plywood drawer boxes built with box joint corners. Using a technique he has never tried, Steve cuts box joints in one-fourth the time! THIS VIDEO IS SPLIT INTO TWO PARTS. Part A takes us through cutting out the parts and cutting the box joints.
Part 7 - It is time to make the decorative drawer fronts and install the trim on the mobile sanding center. In this video Steve obsesses over grain patterns and glues up the blanks for the drawer fronts. He also installs the trim, and learns a shortcut along the way.
Part 9B - In Part B of the Dust Manifold and Power Center for the Mobile Sanding Center project, Steve finishes this shop project. Stay tuned for a series of short shop videos coming soon!
Part 3 - After cutting out the parts, the next step is to make dados, rabbets, and grooves. Steve uses his Festool router and guide rail for half the joinery, and goes to the router table for the other half. Learn a couple of tricks for setting up the Festool router and guide rail for making dead-on perfect dados.
Part 5B - In this second half of the Sanding Center Part 5 *B* video, "Drawers Box Joints," Steve cleans up the joinery, cuts the grooves for the drawer bottoms, cuts out the drawer bottoms, and glues everything together.
Part 8 - Easy, accurate drawer front attachment. In this next-to-last installment of the Mobile Sanding Center Project, Steve attaches the solid wood drawer fronts to the plywood drawer boxes using a fast, easy, foolproof method.